
HYEWON JUNG의 개발일지
20231227 TIL react-calender 사용하기 본문
목표
- ui 짜기
새로 알게 된것/ 오늘의 코드
react library react-calendar
우선 라이브러리 설치하기
yarn add react-calendar
import 해오기
//캘린더
import Calendar from "react-calendar";
//캘린더 기본 스타일
import "react-calendar/dist/Calendar.css";
코드 작성하기
const [value, onChange] = useState<Value>(new Date());Value 는 type인데
type ValuePiece = Date | null;
export type Value = ValuePiece | [ValuePiece, ValuePiece];
구글링했다..
그리고 캘린더를 만드는 코드는 자체는 간단했다
<St.StyleCalendar locale="en" onChange={onChange} value={value} />끝!
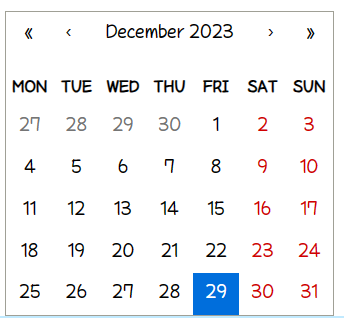
그러면 위 같은 형태의 달력이 나온다
하지만 내가 쓰려는 방식은 스케줄러 형식이니 css를 손봐줘야 했다.
내가 준 설정은 일단 이런 식이다
export const StyleCalendar = styled(Calendar)`
  width: 90%;
  max-width: 70rem;
  height: fit-content;
  font-size: small;
  padding: 1rem;
  padding-top: 0;
  background-color: var(--secondaryColor);
  border: none;
  border-radius: 1rem;
  margin-bottom: 2rem;
  .react-calendar__navigation {
    height: 7rem;
    margin-bottom: 0;
    @media screen and (max-width: 400px) {
      height: 5rem;
    }
  }
  .react-calendar__navigation__label {
    font-size: 2rem;
    @media screen and (max-width: 400px) {
      span {
        font-size: 1.5rem;
      }
    }
  }
  .react-calendar__navigation button:disabled {
  }

  .react-calendar__navigation button:enabled:hover,
  .react-calendar__navigation button:enabled:focus {
    background-color: transparent;
  }

  .react-calendar__tile {
    display: flex;
    height: 7rem;
    text-align: start;
    background-color: white;
    border: 0.2rem solid var(--secondaryColor);
    border-radius: 0.5rem;
    :hover {
      background-color: pink;
    }
    abbr {
      font-size: 1.5rem;
    }
    @media screen and (max-width: 400px) {
      height: 4rem;
      padding: 0.2rem;
      abbr {
        font-size: 1rem;
      }
    }
  }
  .react-calendar__tile:enabled:hover {
    background: #ffe3e7;
  }
  .react-calendar__tile:enabled:focus,
  .react-calendar__tile--active {
    background: pink;
    border-radius: 0.5rem;
  }
  .react-calendar__tile--now {
    background: var(--primaryColor);
  }
  /* hover,focus 시  */
  .react-calendar__tile--now:enabled:hover,
  .react-calendar__tile--now:enabled:focus {
    background: pink;
  }

  .react-calendar__month-view__weekdays {
    margin-bottom: 0.5rem;
    abbr {
      // 텍스트 부분
      font-size: 1.8rem;
      text-decoration: none;

      @media screen and (max-width: 400px) {
        font-size: 1rem;
        text-decoration: none;
      }
    }
  }
  .react-calendar__month-view__weekdays__weekday {
    padding: 0.3rem;
  }
다소 불편한 것이 하나하나 다 고쳐줘야한다는 점이다.
어쩔 수 없지만..
class 이름은 개발자도구 요소에서 확인할 수 있다.
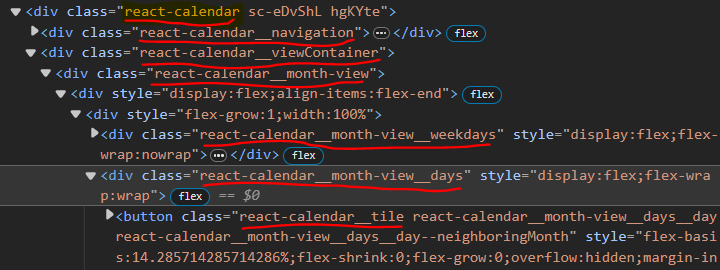
이렇게 또 폰트 같은 경우에는 해달 클래스 안에 abbr 태그에 접근해서 바꿔줘야한다.
그리고 내달력처럼 일마다 간격을 주는 것은 gap이나 margin이나 그런걸로 하면 틀 와장창이니 그냥 tile에 border를 추가하는 것을 추천한다..
tile안에 내용도 넣어야 하는데 솔직히 자신이 없긴 하다~!~!
근데 문제는 스타일이 너무 늦게 적용된다는 점.
구린 달력이 나왔다가 들어가는데 스타일 오버라이딩이 너무 느린거 아닌가..
선택된 날짜 출력하기
<p>{moment(value).format("YYYY.MM.DD")}</P>
출력하고 싶은 곳에 넣어주면 된다. format은 원하는 형태로 하기
typescript 오류가 나지만.. 작동은 되어서 일단 무시했다..
내일 목표
- 일지 데이터 C 하기
'개발일지' 카테고리의 다른 글
| 20231229~1231 TIL (1) | 2024.01.02 |
|---|---|
| 20231228 TIL 라디오 타입 인풋 (0) | 2023.12.29 |
| 20231226 TIL 심화프로젝트 시작 (0) | 2023.12.27 |
| 20231222 TIL (1) | 2023.12.26 |
| 20231221 TIL recoil, 알고리즘 (0) | 2023.12.21 |
'개발일지' Related Articles
more


